
5 Tips for Taming Tearout
Posted by Vic Tesolin on 23rd May 2024
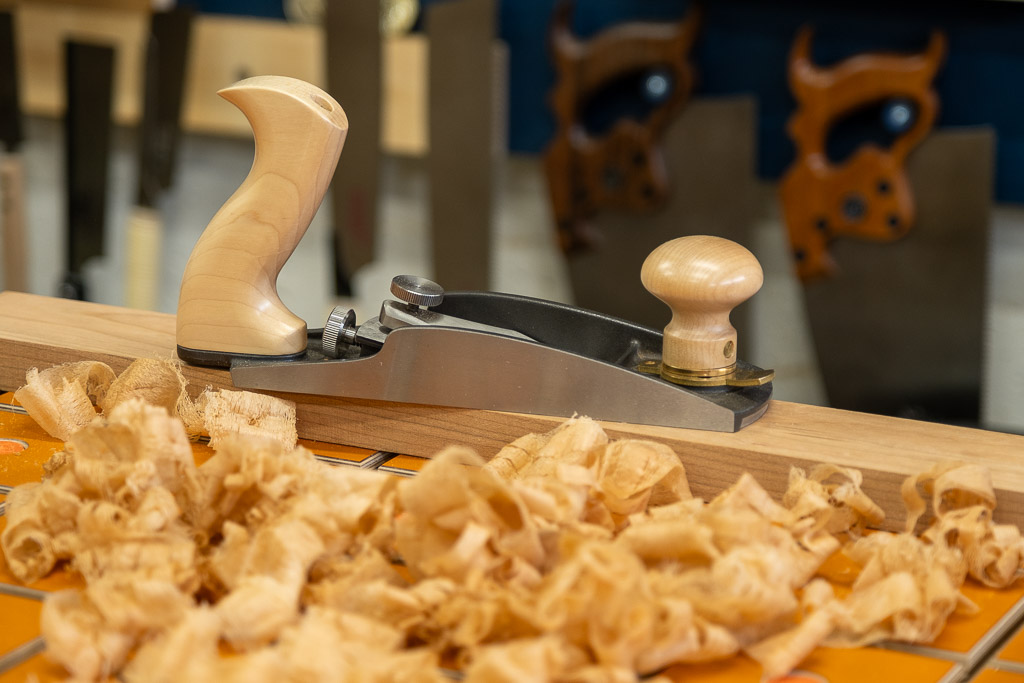
Most people’s first experience with a hand plane is not always good, usually due to fundamental information they haven’t yet received. One of the common problems hand plane users (new and seasoned) encounter is tear-out. Tear-out is when the wood being cut is not well supported, allowing the blade to slip under a small crack, levering out a large chunk and leaving an unsightly void in the surface. The tools are relatively simple, but some tips and techniques must be used to help with success.
A Sharp Blade
One critical factor to success is the blade's sharpness. Out of all the factors that can prevent tearing out, this one is the most important. Without getting into a complete how-to on sharpening, suffice it to say that your blade edge should consist of two flat surfaces that are highly polished and come together, forming an edge.
It doesn’t matter what abrasive you use or whether you use a jig; you must achieve the above goal. The higher the level of polish, the sharper the blade will be. Like anything, you can go too far with this, so if you stop at around 1-3µ (micron), you should have success. For the Pride and King brand of stones, stopping at 8000 grit is required to have the necessary level of polish. Going past this level will technically give you a sharper edge, but the extra keenness will be gone quickly, giving you diminishing returns and wasting your time.
Grain Direction
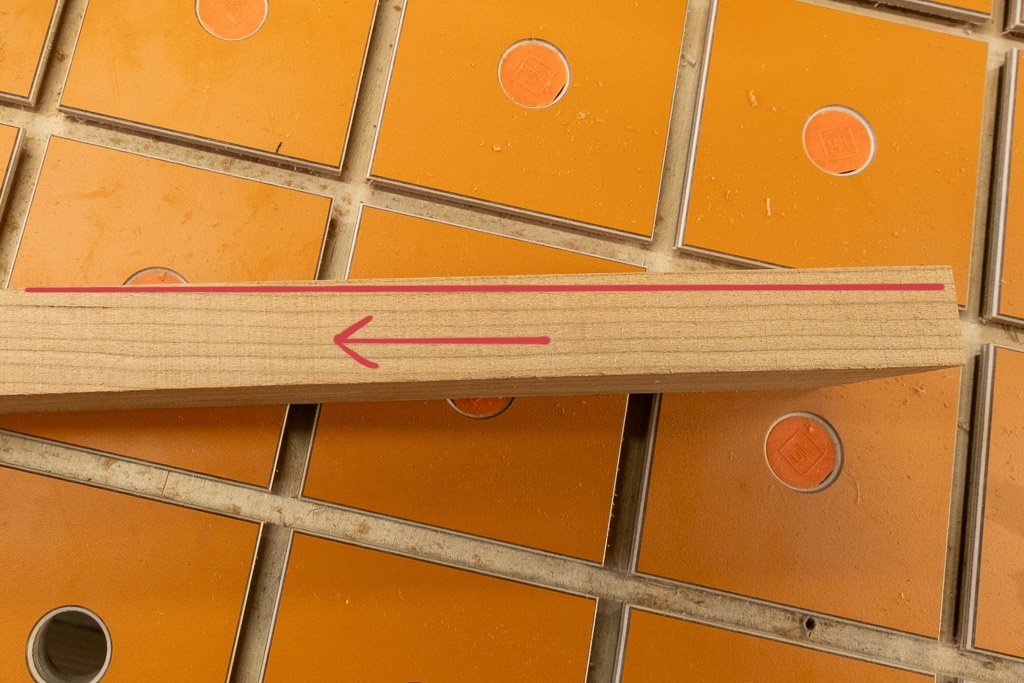
Again, this is another topic that can be explored for days. There are many ways to judge the grain direction of any given board, but there are always exceptions. Looking at the edge of a board, you can often see the grain sloping in one direction or the other. You want to run the plane on the face with the grain rather than against it because the blade can catch the wood fibres and lead to tear out.
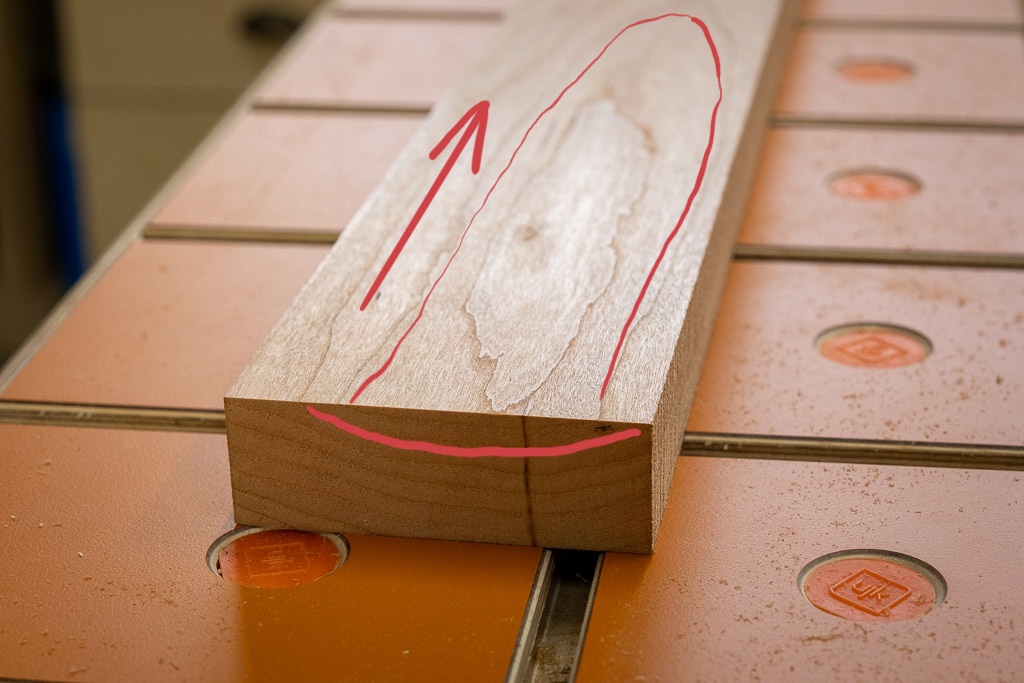
You can also remember the word “within.” You will plane (with) the cathedrals on the (in)side of the tree. Locating the inside of the tree on a board can be done by looking at the end grain to see the pattern. Now, imagine the cathedrals of the surface grain pattern are arrows. You will plane the board toward the ‘arrows’ point. The opposite is true on the other side of the board.
With all that said, wood doesn’t like to follow rules. You can think you have it right and still get tear out, and if that happens, turn the board around.
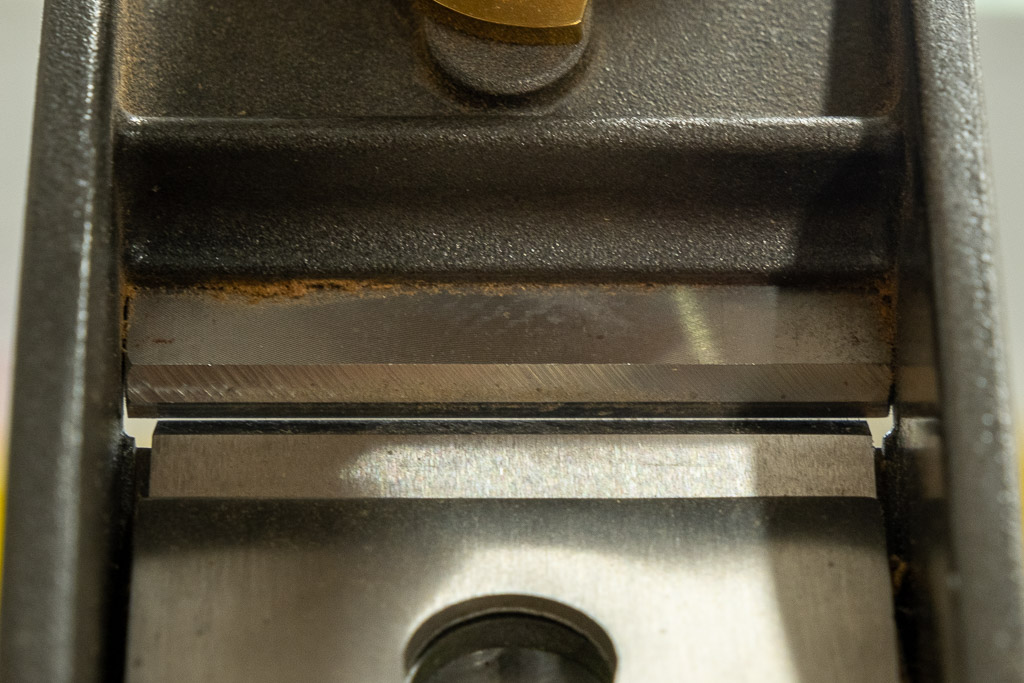
Tight Mouth
The toe of the plane plays a vital role in preventing tear-out. The toe applies downward pressure just ahead of the cut, forcing the fibres to stay down and not tear out. The space created by the edge of the toe and the blade is known as the mouth opening. The closer the edge of the toe is to the blade, the tighter the mouth opening is. For coarse cuts, the mouth will have to be wider and narrower for finer cuts. Strictly speaking, the mouth opening must only be wide enough to allow the shaving to pass through. It’s best to adjust the toe position to match the shaving you’re taking, within reason. Please don’t get out a calliper or anything like that; change it to suit your work. Thankfully, a low-angle plane makes it easy to adjust the opening with a quick turn of a knob.
Correct Blade Angle
Low-angle planes have the advantage of substituting different blade angles to achieve different cutting actions. The MTC line of planes has a bed angle of 12° and comes standard with a blade sharpened to 25°, giving a cutting angle of 37°. This angle is well suited for end-grain work and jointing tasks in softwood and some hardwoods where it is possible to plane with the grain.
Smoothing jobs are often better handled with a medium cutting angle. The 38° blade gives an overall cutting angle of 50°, an excellent general-purpose smoothing angle. The 38° blade is also ideal when traversing (planing panels across the grain).
Timbers with birds-eye, interlocking grain, curly or other cranky grain will be more easily smoothed with a 50° blade, yielding an overall cutting angle of 62°.
Take Sensible Bites
The final tip is to take lighter cuts when preparing the final surfaces. More delicate cuts are much less prone to tear out, so you will likely get a better surface. This doesn’t mean you always have to take thin shavings. If you are dimensioning a board, go ahead and hog off the material as you will; expect some tear-out. Then, when you’re close to your final dimension, touch up your blade and set it for fine shaving with a tight mouth to get the best surface possible.
As I said earlier, planes are relatively easy tools to use if you understand how they work and what techniques will get you results. Every piece of wood is different, so there are no hard and fast rules, but with the advice above, you should be well on your way to being a hand plane master.
To understand, you must do. – Vic Tesolin